Prummern
November 18 1944
This is my attempt at creating a tabletop game base on
the US/British attack to seize Prummern in November 1944. In writing this I am
not in any way criticising or making any negative statements aimed at other
scenarios published about this action – please don`t take offence as none was
intended.
History
Prummern the first phase of Operation Clipper, the
British attempt to close off the German salient around Geilenkirchen.
Geilenkirchen is
situated on the Wurm River, some 20 km (12 mi) north of Aachen. The
surrounding area is undulating, alternating between woodland, farmland and
industrial villages. The area was crossed by a network of passable minor roads,
some major roads and a railway line. The Wurm is the major geographic feature,
the salient was a German position on the Siegfried Line (Westwall) at
the boundary between the British Second Army and the American 9th
Army. It restricted the movement of Allied forces and was a potential threat.
Due to a critical lack
of manpower, it was agreed that the US 84th Infantry Division (Major
General Alexander R. Bolling) would be attached to XXX Corps to assist in the
operation. Placing the Americans under British command avoided any problems
arising from a divided command. The plan called for the 334th
Infantry Regiment to pass through the troops manning the frontline, advance north-east
2 miles (3.2 km) and take Prummern and the surrounding high ground,
east of Geilenkirchen, they would be supported in the attack by British armour.
At 06:00, before dawn, on 18
November, giant searchlights - canal defence lights of the 357th Searchlight
Battery, Royal Artillery provided hazy indirect light by bouncing the
lights off low cloud (often referred to as Monty`s Moonlight) for the
mine-clearing flail tanks from “A” Troop 1st Lothian and
Borders Yeomanry supporting the infantry. These
tanks moved toward the German mine field between Geilenkirchen and Immendorf,
but, on the wet ground, mud lessened the flails′ effectiveness and so US
engineers followed with mine detectors.
After a brief artillery
bombardment, the US 334th Infantry Regiment commanded by
Colonel John H. Roosma; advanced through the
cleared strips at 07:00 and easily secured the high ground east of
Geilenkirchen. When the attack resumed, supported by British Sherman tanks from
the Sherwood Rangers Yeomanry, there was steady progress and the regiment's
objectives were achieved by late afternoon.
The 334th and their supporting armour faced elements
of the German 183rd
Volksgrenadier Division commanded by Generalleutnant Wolfgang Lange which had
been fighting in a purely defensive role around Geilenkirchen since
mid-September. Being pushed steadily back into the fortifications of the
Westwall, during which time they had also been methodically ordered to launch
futile counter-attacks with their already depleted resources to try and
recapture lost ground. Attached to the division was XVI Landwehr Fortress
Machinegun Battalion who`s men manned the bunkers.
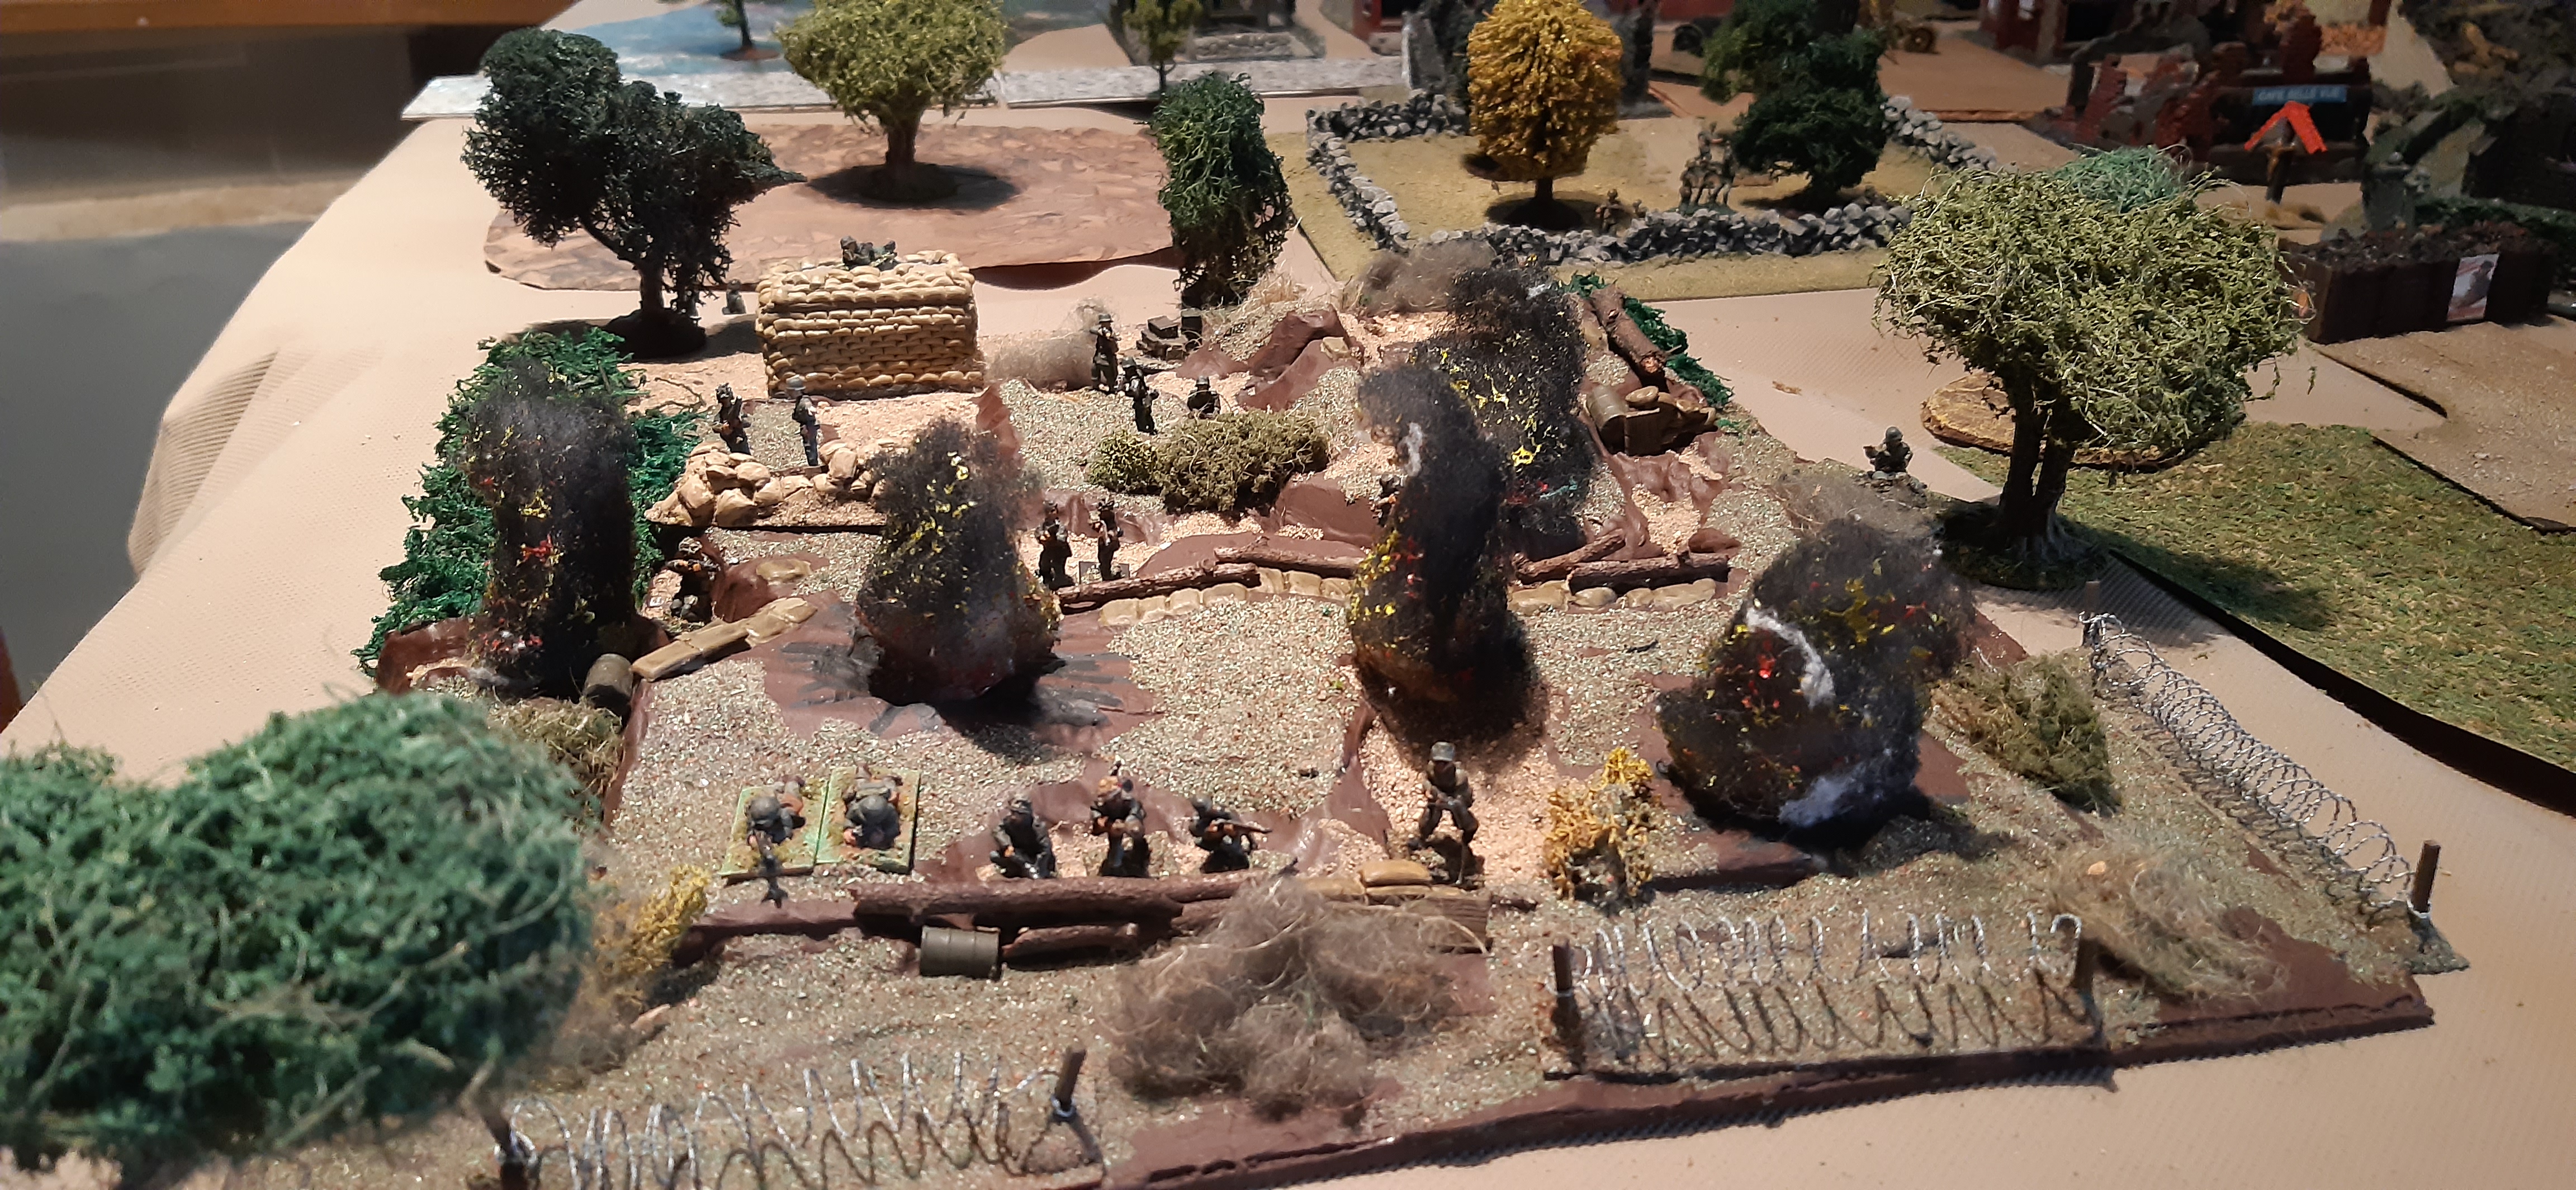
My table
Loherhof farm and flanking bunkers
Hill
101
Prummern


Allied forces
US
334th Regiment (84th Infantry Division) commanded by
Colonel John H. Roosma
1st
battalion commanded by Lt. Col. Lloyd H. Gomes
With:
Battalion
HQ (includes FOOs for artillery support)
3
infantry companies with:
3
x 10-man platoons + support weapons coy (.30cal, 60mm mortar, bazooka)
Close
up of a company support company
Battalion
support weapons coy with:
81mm
mortar battery, .30cal MMG platoon, AT (57mm guns) platoon
Photo includes a
composite battalion HQ group
2nd
battalion (as above) commanded by Lt. Col. James H. Drum (wounded around
10.30am) commanded passed to Major Eleazer (Battalion Exec)
Attachments
“A”
& “B” squadrons Sherwood Rangers Yeomanry
Please ignore the
Free French decals
“Drewforce”
79th Armoured Division with:
Sherman
Crab (Flail tanks) from “A” Troop 1st Lothian and Borders Yeomanry
Churchill
Crocodile (flamethrowers) from 141st RAC
AVREs
of 617th Assault Squadron RE (see scenario notes)
Elements
of “B” company 638th Tank Destroyer Battalion (see notes)
Free French M10
pretending to be an American M18
Battery
B 326th US Field Artillery
105mm
howitzers
121st
Medium Battery RA
5.5”
howitzers
German Defenders
1
weak company of XVI Landwehr Fortress Machinegun Battalion manning first line
of bunkers with:
2
x 12 man platoons (LMG, Panzerfaust)
Battalion
183rd Volksgrenadier Division (Oberst Hampfuer) with:
HQ:
CO, 2IC, FOO team (Panzer Artillery 106), 2 RTO, 2 officers, NCO, 6 runners,
Panzershreck team, sniper, medical unit
3
rifle companies each with: 4-man HQ, 3 x 9-man platoons (LMG, Panzerfaust)
Support
Coy: 2 x MMG, 2 x 81mm mortars, panzershreck team
Attached
1
x Pak40, 1 x `88
Battery,
II battalion, Panzer Artillery Regiment 102 (105mm)
Reinforcements arrive by truck by
either northern road after turn 15
2nd
Company Panzergrenadier Regiment 10, 9th Panzer Division with:
Coy
HQ (CO, NCO, RTO, 2 runners)
2
infantry platoons – 10 men each (LMG, Panzerfaust)
1
reduced infantry platoon – 5 men + MMG team
Scenario special
rules
AVRE`s whilst noted in
accounts of the actions around Geilenkirchen I`ve not read of them actually
being involved at Prummern so haven`t included them in my game.
638th
Tank Destroyer Battalion were equipped with M18 Hellcats, I don`t own one so
have substituted an M10 for my game
Mud – the ground is
totally waterlogged with areas of deep mud – tanks move off road at half speed
due to this!
Tanks
moving off road must roll every move to avoid becoming bogged down: 1-2 on D6 results
in a stoppage, the next turn a further roll is required to free the tank (5-6
required), but if a further “1” is rolled the tank is lost and permanently
trapped!
Wheeled
vehicles cannot move off road!
Unmarked
minefields
– mines and booby-traps appear to have been scattered about without plan. The
German defender can place 2 off 4 x 6” mixed low density fields and 3 off fake
fields anywhere between the railway and Prummern.
Bunkers can hold up to 6
men and are virtually impervious to all attacks, but defenders cannot return
fire if “buttoned up”
Loherhof farm has been
fortified as part of the forward line of resistance and buildings provide hard
cover with overhead protection
Hill 101 has been
partially fortified with trenches (some with overhead protection) and barbed
wire
Sources
Forgotten
Battles: The West Wall by Peter Heath ISBN978-7399954-3-0
Rapid
Fire! Brothers in Armour by Colin Rumford & Richard Marsh (Valiant
Miniatures Ltd)
Brothers
in Arms by James Holland ISBN 978-0-5521-7791-7
The
Battle for Geilenkirchen by Ken Ford ISBN 0-7153-9208-5
Web
pages:
https://en.wikipedia.org/wiki/Operation_Clipper
https://www.nationalww2museum.org/war/articles/operation-clipper-fight-geilenkirchen
https://tankdestroyer.net/images/stories/ArticlePDFs2/638th_History_Complete_-_Reduced_OCR.pdf
Pages
27-31 cover the fighting around Geilenkirken
https://cgsc.contentdm.oclc.org/digital/collection/p4013coll8/id/3605/
Pages
2 &3 give brief accounts of the daily AAR from the 638th TD
battalion during the Geilenkirken fighting
The
Game
The
game starts when the Sherman Crabs of the Lothian and Borders Yeomanry finally
clear a path through the minefield. They lost several tanks which became bogged
down and the heavy mud lessened the effectiveness of the flails so US Army
engineers followed and assisted clearing the lanes with metal detectors and
lifting mines by hand.
I
decided one Crab would lead each column of Sherwood Rangers Yeomanry until they
reached the railway line. “A” troop had to cross the entire width of the table
behind the embankment (as they did historically) due to their lane becoming so
swampy it became impassable.
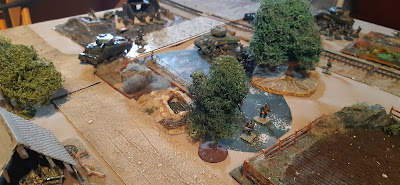
Turns
2-3 saw the British tanks advance, “A” troop saw what became a regular occurrence
with tanks getting stuck, then freeing themselves the next turn – this slowed
everything down to a snails pace. “B” troop reached the railway line backed up
by “E” company of the the US 2nd battalion
Turns
4-6 “B” troop plastered the bunker in front of them and “E” company moved forward
under their protective fire, they did lose a few men to accurate German artillery
fire. “A” troop struggled along behind the embankment, each and every turn saw
at least one tank stopped in the heavy mud until finally on turn 6 the lead
tank found itself totally immobilized after two consecutive 1 were rolled!!
Turn
7 The bunker in front of “B” troop surrenders, but of course there is another
across the road, so they move to engage it! “A” troop and the Crab engage the
first bunker on their side of the table with cannon fire whilst "A" company of the US 1st battalion moves forward.
Turn
8 “B” troop and “E” company move to engage the second bunker, pouring fire into
it to keep the defenders heads down and buttoned up.
One
of the “A” troop tanks supporting “A” company on the other side of the table
has a lucky escape when a nervous German misses him with a Panzerfaust at point
blank range!
Turn
9 retaliation by the “A” troop tank is swift
Supporting
infantry from “A” company storm the building and kill or capture all remaining
defenders.
On
the other side of the table a “B” troop tank is knocked out by a Pak40
concealed in Loherhof farm
But
fire from the other tanks and “E” companies support platoon have finally
silenced the bunker.
Turn
10 “A” troop and “A” company silence their bunker, but the infantry come under
fire from Loherhof farm
Both “B” troop tanks fire on the Pak 40 (after it hits but fails to penetrate
the Firefly) and wipe out the nasty threat
Turn
11 “A”
troop and “A” company prepare assault Loherhof farm, both US battalion HQs call
for artillery onto Hill 101.

The
effects of batteries for 105mm and 5.5” artillery was quite profound
Turn
12 “A” troop shelled Loherhof whilst “A” company moved into the assault
The
Firefly of “B” troop together with combined artillery, 81mm and 60mm mortar
fire pounded Hill 101 to devastating effect, the Germans could only reply with
mortar fire (unobserved and inaccurate)
Turn
13 Half of “B” troop pitches into Loherhof,
On
the other side of the farm complex “A” company get a nasty surprise from yet
another bunker, luckily a tank for “A” troop is there to try and supress it.
Whilst the company launches its attack
Turn
14 “E” company of 2nd battalion has taken quite a few accumulative casualties
(including the company CO) and fails its morale, luckily “F” company has
arrived and takes over the attack on Hill 101 – where accumulative casualties
have broken the defending German company who abandon the hill.

A
Sherman from “A” troop breaks into Loherhof a panicked defender misses it with
a point blank Panzerfaust shot (luck was with the British tankers today), US
infantry also storm the compound
Turn
15 “A” troop move to suppress the next bunker, “A” company clear the remaining
buildings of Loherhof.
British
tanks and “F” company move up onto Hill 101
Turn
16 German reinforcements arrive from the north
This
seemed like a good place to end. The Allies have control of the high ground
over-looking Geilenkirchen which was the objective of this operation. Yes the
didn`t have Prummern, but the Germans only have a couple of infantry companies
and virtually no heavy weapons left.