The
A version of this article originally appeared within The Journal of the SOTCW

The French attempts to pacify the southern Moroccan region of Chaouia had began back in 1906 when they were forced to land troops at Casablanca to protect European interests from local rebels. At the request of the Sultan Abd el-Aziz the French first garrisoned the town, and then began to expand their control in an attempt to rest the area from rebel control. All efforts were restricted by governmental interference and political bickering from back home in France and it wasn’t until Sultan Aziz`s rule was in seriously in danger late in 1908 that the French finally decided to act.

The
man given the task of pacifying Chaouia was General Albert d`Amade (who later in
1916 proved very mediocre as commander of the French contingent in the
Trouble is d`Amade was unable to get the Moors to accept battle, on this large open plain the Moroccan horsemen evaded the columns again and again. When the French did arrive at the isolated douars (villages) or Ksars (walled compounds also called Kasbahs) they found them abandoned except for Jewish merchants or Moors too old and weak to flee. When resistance was encountered the disciplined rifle fire from the legionnaires, Zouaves and tirailleurs usually discouraged the Moroccans from getting too close, the French could also call on their 75s to add quickly to their available firepower.
The French quick fire 75mm model 1897 was a wonderful weapon of warfare, perfectly suited to an area like Chaouia. Extremely light, it could be towed along with its caisson by a team of four horses or at a pinch even two mules or camels. This made it highly mobile, it also had a high rate of fire and had an effective range of 6 miles, though before the days of aerial observation it was seldom used against targets over two-and-a-half miles away.


An odd thing about the style of warfare in
Pressure on d`Amade built up over the months of his command, his in-ability to bring the rebels to battle, mounting casualties among the French officers and the escalating costs of the campaign all counting against him.
Due to this pressure in late February he ordered another column assembled add headed out onto the plain to harass the rebels. The actual size of the force committed was very large as d`Amade hoped to bring a major portion of the rebels to battle and crush them in one action.
French forces of General d`Amade
7 Battalions of infantry – 2
Legion, 2 Zouave, 3 tirailleur
3 batteries of 75mm guns
5 squadrons of cavalry – 3
Chasseurs d`Afrique, 2 Spahis Algerian
A mountain gun battery
A section of quick-fire naval
37mm guns
Total strength – 5,500 men
On February 29th the column arrived at Wadi M`Koun (sometimes called Oued M`Koun), the river was wide and the banks steep, on the far side the bank climbed up to a crest known locally as R`Fakha. Whilst scouts searched for suitable fords and engineers began to prepare trails for guns and wagons d`Amade ordered Colonel Luigne and his Chasseurs d`Afrique to cross over and secure the crest.
Chasseurs
d`Afrique

Founded in 1831 in Algeria primarily as
mounted infantry, each man carried a sabre, but was also armed with a carbine.
The Chasseurs suffered from an inferiority complex where they tried at every
opportunity to downplay their role as glorified infantry and to act as more
prestigious troops – the cavalry of old with panache and offensive spirit.
The Chasseurs orders were to occupy the crest, if attacked they were to dismount, form a firing-line and await reinforcements. A Company of Legionnaires and another of Zouaves were also sent across to picket the eastern shore, but the bulk of d`Amade`s force remained on the western side awaiting a re-supply column, this left those men on the eastern bank dangerously exposed.
As
the first squadrons climbed the crest they came under fire from concealed
Moroccans, as per the unit’s nature, sabres were drawn and they charged. Whilst
several rebels were cut down, others remaining concealed continued to pour fire
into the horsemen, causing several casualties.
This withdrawal also impeded the second Chasseurs squadron which was galloping up to the hill towards the battle. Whilst both squadrons were reorganising, they saw to their horror that their comrades, who lay wounded on the hill or had be un-horsed were being hacked to pieces by the Moroccans who were now swarming over the crest.
Col. Luigne ordered another charge to rescue the survivors and regain the crest. Another bloody attack was mounted against the Moors on the hilltop; a company of tirailleur had waded across the river and climbed up to support their cavalry comrades in the attack.
The Moors fought furiously against the cavalry until the tirailleur reached the crest and joined the battle; there was also some belated artillery fire from the far bank. At which point they withdrew down the far side of the ridge and with surprising speed and organisational skill shifted their entire force (shielded from French observation by the ridge) to the French left and launched an attack against the infantry struggling up the wadi banks there!
The Legionnaires and Zouaves formed up and repelled the attack with concentrated steady fire, supported by 75s from the far bank.
The Chasseurs lost twelve dead and another twenty-five wounded plus over thirty horses, the 1st tirialleur company had four killed and several wounded by their own guns! And the Zoauves had a dozen killed and twenty more wounded against some forty Moorish dead. At the end of the battle with the Moors in full retreat, Col. Luigne rode up to d`Amade saluted him with his sabre and said – “My General, you ordered me to hold the crest of R`Fakha – I held it”.
Recreating the battle
The
French commander should be encouraged to believe that the main battle will take
place at the village and Kasar (or Kasbah) at M`Karto several miles east of
Wadi M`Koun. The need to build a track and ford for his artillery and wagons
should be made his priority, how he sets his pickets is of course up to him,
but no more than 2 infantry companies and 2 squadrons of cavalry should be
allowed.
Initially the Moors have only a few sharpshooters up on the ridge on the French right, these should attract the cavalry picket, but be too scattered for any artillery set up on the far bank. Once the cavalry engage the Moors, more and more rebels will arrive and join the battle. At this point the French commander may send infantry reinforcements (the company of Tirailleur) from across the river, but he must not use those infantry already on the east bank.
The French artillery on the west bank will be unable to give support due to having trouble finding and identifying targets over the river, any attempts to fire into the melee will inevitably cause allied casualties……
Once
the tirailleur arrive at the ridge, the Moors will withdraw and be seen to flee
east away from the river. This is a faint and a little later they launch a
surprise attack against the French crossing the river. Moorish horsemen and
infantry charge into the left flank of the unsuspecting column (the French
thought the battle was over) catching a company of Zouaves mid-stream helping
wagons/gun limbers. Things were pretty close until a company of Legionnaires
arrived and some 75s on the west bank assisted with canister and high
explosives.

1st Squadron Chasseurs d`Afrique (high morale) with
HQ – CO, 2IC, standard,
bugler, 6 men
5 - troops of 20 men (carbine
+ sabre)
2nd Squadron Chasseurs d`Afrique
As 1st squadron
Rifle Company 5th Algerian Tirialleur (regular)
120 men
Once the tirailleur arrive at
the foot of the ridge, the French get support fire from a battery of 75s on the
west bank *
Moorish forces (all regular)

30 – 40 sword/spear armed
warriors, initially hidden behind the ridge
20 – 30 mounted warriors (half
armed with rifles/muskets), initially hidden behind the hill
* Once the tirailleur arrive at the foot of the ridge the French commander gets the option of support fire from a battery of 75s. Unfortunately during the battle the range, confusion in orders and poor visibility caused the battery to fire upon the tirailleur, thinking they were the enemy!
After a couple of salvos the “enemy” were seen to go to ground and the battery shifted its fire further up the ridge. About twenty minutes later a dusty and very tired tirailleur arrived at the battery and smartly saluted the officer in command –
“Sir with the compliments of my officer, your shooting was excellent – you killed four of our men”!
Once the tirailleur arrive at the ridge top, the Moors will break off and retreat and it will look to French as if they have won. Actually the enemy are moving along the dead ground from the French right to their left, from where they launch a surprise attack against the column which have now relaxed believing the battle over.


30 – 40 sword/spear armed
warriors
20 -30 mounted warriors (half
rifle armed)
Company of Zouaves (regular)
100 men
Wagons, guns & limbers
1D6 + 6 turns after the
battle begins the French get –
Company of Legionnaires (veteran)
120 men
Support fire from a battery
of 75s
An interesting colonial action, where for a change the natives have the upper had in position, numbers and tactical awareness.
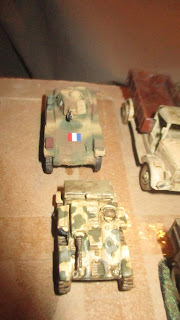
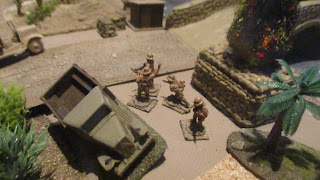
Figures
I
game in 20mm so used the following figures -
Zouaves and Legionnaires
looked and dressed pretty similarly during this period with white trousers,
jackets and soft kepi with havelock. To vary the types you could have the Legion
in their blue frock coat or have the Zouaves in sun-helmet. B&B Miniatures do nice figures with
both kepi and helmet including mounted and artillery crews; you could obviously
also use figures from Tumbling Dice,
or in plastic by Italeri or Airfix (Hat) too.


Algerian Tirialleur wore a red tarbush (fez), baggy Turkish trousers, shirt and a red cummerbund (sash), Tumbling Dice do excellent Tirialleur in their WW1 range, you could also use SCW Moroccans or Sudan/Mahdi uprising Egyptian figures.

Senegalese Tirialleur were dressed as the Algerians above, but of course were black Africans, I use Waterloo1815 Anglo-Egyptian Infantry for these.

Algerian Spahis - white or red cloaks over red jackets, baggy Turkish trousers and cummerbund, I converted Warrior Miniatures SCW Moroccan cavalry with heads from Raventhorpe and cloaks of plasterscene for my Spahis.

Chasseurs d`Afrique – white tall kepi, pale blue jacket and red breeches,
I use Warrior Miniatures SCW mounted infantry with head-swaps using Raventhorpe tall kepi heads for these.


Sources
In Morocco with General D`Amade by Sir Reginald Rankin (published by
The Conquest of
Les Chasseurs D`Afrique by Jacques Sicard & Francois Vauvillier (ISBN
2-908-182-874)